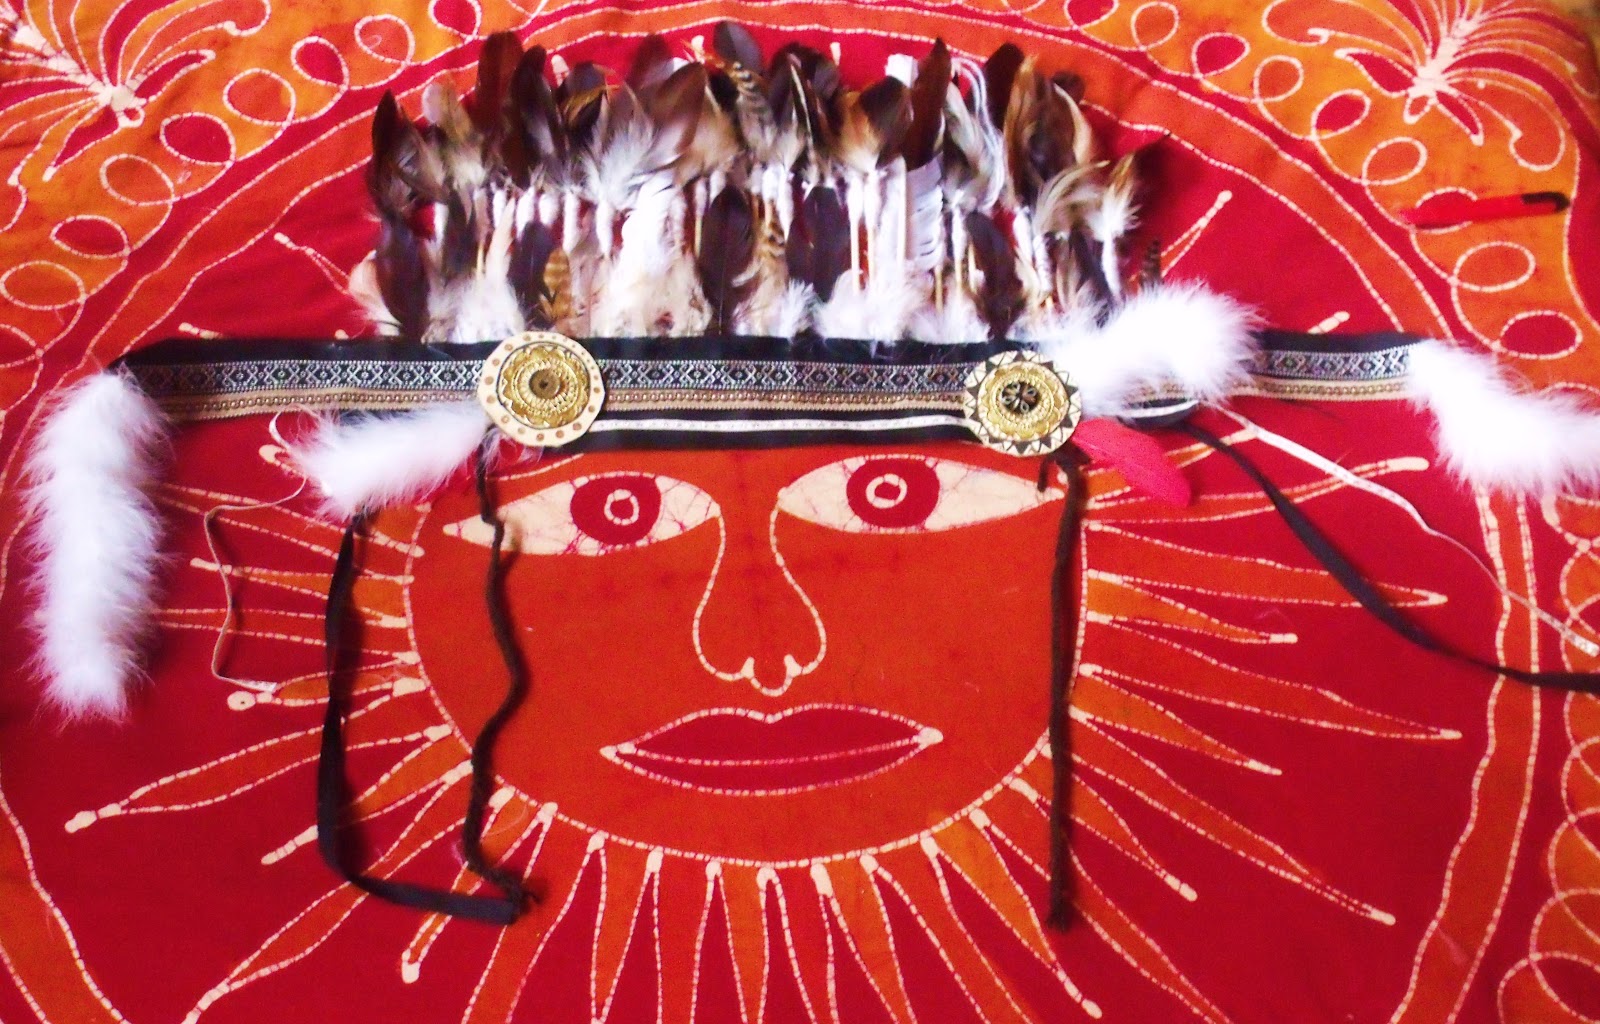
Tuesday, February 19, 2013

How the West was Won....Cowboys and Indians accsessories

 
Wanna play cowboys and Indians?
photo c.1905


Saturday, February 9, 2013

The raven, wood, and silver: DIY Bali Flares

The raven, wood, and silver: DIY  Bali Flares: Hello...the other day I was browsing the Free People Catalog online and instantly fell in love with the Discharge Bali Flare Jeans!!!...

DIY Bali Flares


Hello...the other day I was browsing the Free People Catalog online and instantly fell in love with the Discharge Bali Flare Jeans!!!


Discarge Bali Fare
www. Freepeople.com


Unfortunately as a "starving artist''...there's no way i can afford them.....but, as a "starving artist", i can make them! So I took and old pair of jeans and went crazy!

Here's what you'll need...
 an old pair of flairs
off white fabric paint
or akrylic paint mixed with fabric paint medium
cotton swabs
white chalk
and LOTS of time!


before

                                               
 use the white chalk to make the design


The cotton swab will be used as your paint brush
i would suggest that you add water if you want a worn or faded look
use different stamps and brushes if you choose.
These are based on the Free People jeans, not an exact replica...
so make them your own!
This project is time consuming but so, so worth it !
                                  

This is the end result!            
              
Wash them  first for a faded look but make sure you iron them to prevent too much fading!!!!

                                                                
i hope that you'll enjoy wearing these pants as much as i do!!!!
                                                                
photos by Michal
                                                          

Sunday, January 27, 2013

The Feather

Happy New Year.!!!!.....Long time no blog....finally I came out of my crysalis and this is what  I came out with....
                                                           Photo taken by Michal                              
I wanted a soft and natural looking  feather that popped from my skin with out the harsh black line....something demure, and sensual.....                   

Sunday, December 2, 2012

DIY Native American influenced War Bonnet

i've always admired the romantic beauty of the Native American arts and culture...i teach in my art class here in the Czech Republic and  i make Native influenced jewlery...ect. i hope that you will receive inspiration from these tutorials to make your own...P.S....i know , i know that women wearing War bonnets is frowned upon,but there's no disrespect....This is the year 2012...and women can do whatever we want....

                                                                 The War Bonnet
     To start, chose any feathers that your heart desires..It's your own influence from these rich cultures, not an exact replica. It is hard to find and expensive to buy large feathers in Prague. So i took medium sized and small feathers hot glued them to skewers, then wrapped yarn around the tops.Then i measured a thin corregated cardbord strip around my head to the back of my ears. Make it longer if you like. Glue the sticks in the cardboard holes.
add as many feathers as you like.
it looks better when the small feather with the "furry" texture, or plumes are near the crown.
 
Then i took three thick strips of fabric and sewed trimming on the top. You can use two.
I can't tell you measurements...this will have to be trial and error...This labour of love is time consuming
but
worth it.
Secure the back strap with straps that tie around your head at the ends, or use a strap long enough.
i glued mine because i used sticks,feathers can be sewn on.
This one is a short bonnet, the feather band can be as long as you like.
 
Decorate the top band with trimming. make the trimming longer than the band to add texture.
Secure it to the top feathers and to the back strap.
Add the rossettes(the round things on the side)
For these, i used decorated cardboard and gold doilies.
i then tied it on the sides of the forhead with yarn old buttons.
use a picture for the positioning.
After they are tied add feathers,plumes and or braided cord behind the rosettes.
                                   i added plumes to the end because the feather band is short.
                                                
This is the final result.
I love my bonnet, when i'm not wearing it,it sits in my flat as decoration.
I hope this was resourceful to you.
Have fun and try different things when making your own.
Example.Wrapping flat thin trimming around the bottoms of the eagle feathers, then securing them to the band will create a wider,more authentic and moveable bonnet.
 
enjoy!!!


Sunday, November 25, 2012

A Native of November


   As November draws to a close i reflect on the Native American spirit, mystery and inspiration...                                                        
                                    
             my brave
           
           Barrett
 
                                  These are two of  my Native inspired paintings from The Romantics
                                                           
Zuni Woman
Bear Claw Necklace           Navajo Ceremonial Costume                      
Cheyenne GirlA Navajo man in ceremonial dress             Jicarilla Girl    
These haunting and mesmerising photos are from old-picture.com.
                                                        
                              
I don't own these photos of Willy Cartier...They are from Tumblr.com


                                                         These are my photos influenced
                                                                  by the Native spirit...

Sunday, November 11, 2012

DIY Steampunk watch/bracelet


This year for halloween i wanted to be vintage, but use the things that i have a home to make a costume....(i have too many clothes)..Then eureka! Steampunk Time Traveler. Steam punk combines the Victorian look, with an cog and steam powered industrial revolution look.The only thing i bought was a watch...which i took out the watch part and filled it with bits of old jewllery, findings and cog like skrews!..It doesn't move or tell time but it looks so so cool....
What you'll need is...
a cheap watch with a cool band (use natural colors it looks more vintage)
use the watch parts if they aren't plastic
little charms
super glue
tiny nails


I'm so in love with this style!! i'll be posting more for sure!

 
me...with my steampunk watch....